Showing posts with label Recipe's. Show all posts

Sunday, March 20, 2016

How to Make a Tortilla Cheese Roll Up

A cheese roll-up is wonderful and easy snack to eat on a relaxing day, and this wonderfully made article will show you how to make a yummy cheese roll up.

Ingredients
  • Tortillas
  • Shredded cheese
  • Sour cream (optional)
Steps

1 - Gather up your ingredients. The ingredients are really easy to find at Walmart or a local grocery store.

2 - Rip off a paper towel and lay it down on a flat surface.

3 - Sprinkle the cheese on the tortilla. Sprinkle as much cheese as you want on it. It's your choice!

4 - Wrap the tortilla up. Wrap it as tight as you can.

5 - Put the roll-up in your microwave for 15 seconds.

6 - Let it cook thoroughly. If it's not cooked thoroughly, let it cook for extra time.

7 - Finished

Akaline Red Bean Rice Dumpings


Ingredients
500g glutinous rice, rinsed and soaked for at least 4 hours
1¼ tsp alkaline water (kan sui)
Dried bamboo leaves, boiled till soft and wiped dry
Red bean paste filling
250g red beans, washed and soaked overnight
200g castor sugar
150ml oil

Method
To prepare red bean paste
Cook beans in a pot of water till soft. Drain off the liquid and blend or process the cooked beans to form a smooth paste.
Put the bean paste in a non-stick saucepan and cook until dry. Add sugar and stir until sugar dissolves, then add in oil. Stir slowly until the mixture turns into a smooth paste. Remove the paste and allow it to cool completely. Divide the red bean paste to make very small balls.

For the dumplings
Mix the glutinous rice with the alkaline water for about 15 minutes.
Take 2 bamboo leaves and fold into a cone. Put a tablespoon of rice in the cone and add a ball of red bean paste. Cover with more glutinous rice. Shape the cone well and secure with hempstring. Repeat the process to make more dumplings.
Boil the dumplings in rapidly boiling water for 3½-4 hours. Drain the dumplings well before serving.

See how to : Wrapping Rice Dumping

Red Bean Filling ( Tau Sar Filling)


Ingredients
1 1/2 cups red beans, washed well
4 cups water
1/2 cup vegetable shortening
1 cup sugar


Method.
1. Soak  beans with water overnight . This helps shorten the cooking time.
2. The next day, bring the beans and water to a boil. Simmer for 1 ½ - 2 hours, until the beans have softened, adding more water as necessary. Drain. Make sure always have just enough water to cover all the beans.
3. Blend them into a puree in a hand held blender or food processor.


4. Press the puree through a sieve, discarding the skins, which will be left in the sieve.
5.  Place the thickened puree back into a saucepan, together with the sugar and vegetable shortening, and heat over low heat, stirring until it becomes a thick paste. Stir and scrape vigorously so that it does not stick to the bottom.
6. Remove from heat and let cool before filling buns.

*Stored in a sealed container in the refrigerator, homemade sweet red bean paste will last for approximately 1 week.

Glutinous Rice Gelatinized Bread

This is another method to create a soft and fluffy even after many days using glutinous rice flour in the starter dough. May also be baked as a whole loaf without any fillings.


Ingredients for Glutinous Flour Gelatinized:
  • 2 2/3 tbsp glutinous rice flour 糯米粉
  • 4 tbsp water
  • 1/2 cup bread flour
Method :
  1. Combine glutinous rice flour and water, mix well.
  2. Heat the mixture over low heat until thicken, off the heat immediately once the mixture started to thicken and keep stirring until it turns gluey.
  3. Stir in  Bread flour gradually and mix to form a dough.
  4. Then leave to cool before adding into the main ingredients.


Ingredients of Main Dough :
(A)
  • 1 eggs, beaten
  • 1/3 cup water
  • 1 1/3 tsp honey

(B)
  • 2 tsp yeast
  • 3 1/3 tbsp sugar
  • 1/3 tsp salt
  • 2 2/3 tbsp milk powder
  • 1 2/3 cup bread flour

(C)
  • 27gm cold butter, cubed
  • 2 tsp corn oil


Method :
1.  Combine ingredients (A) & gelatinised dough pieces into ingredients (B), mix to form a soft dough.
2.  Then add in ingredients (C) and knead till the side of mixing bowl is clean.
3.  Leave the dough to rest for 1½ - 2 hour or until double in size.
4.  Punch to knead out the air and must be handle with care cause the dough is pretty sticky. Dust on extra flour if needed.
5.  Then divide dough into 13 equal portions and fill with Red bean paste filling.
6.  Sealed and place them to a 5x9" tray with butter coating.
7.  Again let to rest for another 1-1½ hour or until double it's size.
8.  Brush on egg glazing and sprinkle the top with sesame seeds.
9.  Bake at preheated oven 175-180'C for about 20 mins or until golden brown.
10 .Leave to cool complete before serving.


*If you want the buns to look more attractive and appetizing, you can glaze them while they are still
hot with butter, margarine, apricot gel, egg white or sugar syrup.
( Cook 1part of sugar with 2 parts of water till boiling).

As a Bread loaf- skip step 5.and divide dough into 4  portions. Shape into oval shape
and continue on step 6.

Roti Paun ( Red Bean Paste or Butter milk )


*makes 18pcs of roti paun and extra with few buns

Gelatinised dough
  • 100g bread flour
  • 70ml hot boiling water

Steps
  1. Place  Bread flour in a mixing bowl.
  2. Add hot boiling water and mix with wooden spoon to form a rough dough..
  3. Cover bowl with cling film and leave dough to cool in the fridge for at least 1 hour or up to 48 hours

To prepare Basic sweet bread dough
  • 300g bread flour
  • 100g plain flour
  • 80g sugar
  • 1 tbsp instant yeast
  • ½ tsp salt
  • 175ml cold milk
  • 1 cold grade A egg
  • 60g cold butter, cubed
Steps
  1. Combine flours, sugar, yeast and salt together in a mixing bowl.
  2. Tear the gelatinized dough into pieces and add to the bowl along with the eggs
  3. Using a stand electric mixer, mix on low speed, adding cold milk gradually.
  4. Mix until dough is well combined and leave the sides of bowl.
  5. Add in the cold butter cubes and mix on medium speed until dough is smooth. Leave stand to prove for 2 hour or until double in size.
  6. Shape dough into a ball, leave to proof for  another 30-60mins.


To assemble Roti Paun
  1. Divide and shape bread dough into a small ball weighted 30g each.
  2. Spoon 1tsp of butter filling and wrap inside the small dough ball.* See below
  3. Place dough ball in a greased 9” round cake tin (removable base).
  4. Once completed, set aside to rest for 15mins.
  5. Apply egg wash on top of the dough balls.
  6. Bake at preheated oven at 180c for 20-25 mins.

Click how to make Red Bean Paste  or  here

Variations 


Butter milk fillings
  • 70g butter
  • 30g icing sugar *
  • 1/8 tsp salt
  • 30g whole egg (about half egg)*
  • 1 tbsp cornflour (can add more)
  • 80g skimmed milk powder

*you can use the other ½ egg for egg wash. 


Method:
  1. Cream butter, sugar and salt until creamy.
  2. Add in egg in batches mixing well each time.
  3. Put in corn flour and skimmed milk powder, mix well with rubber spatula. Add more corn flour if dough is still too soft or watery depending on your egg size.

* Careful to seal buns well to prevent leaking when baked.  Make the same mistake twice. 
*If you want the buns to look more attractive and appetizing, you can glaze them while they are still
 hot with butter, margarine, apricot gel, egg white or sugar syrup.
 ( Cook 1part of sugar with 2 parts of water till boiling).

Making White Bread ThangZhong


Ingredients:
  • 1/2 Cup (120ml) water
  • 1/4 Cup (24g) Bread Flour
Bread Dough Ingredients:
  • 1/2 Cup  Milk
  • 1/2 Teaspoon Salt
  • 3 Tablespoon Sugar
  • 3 Tablespoon Melted Butter
  • 1 1/2 Cup Bread Flour*
  • 1 1/3 Teaspoon Active Dry Yeast*  I used instant yeast see below
* If instant yeast is used, reduced the yeast by 20% and add extra tsp of sugar to avoid the yeast smell of over fermentation. (1tsp instant yeast Plus 1tsp sugar)

To Make The TangZhong

Whisk the bread flour and the water together in a heat proof saucepan. Heat the mixture at low heat till it thickens .(about 2-3 mins), continually stirring till the mixture start to have “lines ”- gluey and starchy

Transfer to a bowl and cover loosely with plastic wrap to prevent from drying and after completely cool down you can start using it or keep in the fridge for up to 48hrs..

To Make The Bread:
  1. 1. Take out the TangZhong from the fridge at least an hour before use.
  2. 2. In a mixing bowl, add in warm milk, TangZhong, salt, sugar, butter, bread flour and yeast. Add more flour if dough is too sticky. Knead the dough for 15 to 20 minutes and proof it for 1½ - 2 hour until the dough double in size
  3. When dough is ready, punch down to deflate it. Divide dough into 4 equal portions. Leave them in a warm place to rest for 15-20 mins.
  4. Knead each dough a few times and shape each into an oval shape. Place them diagonally into a 9 x 5 inch loaf pan . Let dough proof the 2nd round for 1-1½  hours in a warm and moist place or double in size.
  5. Preheat oven 180°C / 355°F. and bake for 23-25 mins.

How to Make Donuts, Part 3 : Baked Glazed Donuts


Ingredients for Baked Glazed Donuts
  • 2 cups all-purpose flour
  • ¾ cup white sugar
  • 2 teaspoons baking powder
  • ¼ teaspoon ground nutmeg
  • ¼ teaspoon ground cinnamon
  • 1 teaspoon salt
  • ¾ cup milk
  • 2 eggs, beaten
  • 1 teaspoon vanilla extract
  • 1 tablespoon shortening (or 2 tablespoons melted butter)
For glaze:
  • 1 cup confectioner's sugar
  • 2 tablespoons hot water
  • ½ teaspoon almond extract

Steps

1 - Preheat your oven to 325℉ (165℃). Lightly grease a doughnut pan.

2 - Into a large bowl, sift together flour, sugar, baking powder, nutmeg, cinnamon and salt.

3 - Stir milk, eggs, vanilla, and shortening together before incorporating into dry mix. Beat the batter together until well blended.

4 - Fill the doughnut pan so each cup is ¾ full. The doughnuts will rise as they bake in the oven.

5 - Bake the doughnuts for 8-10 minutes, until they are springy when touched. Allow to cool slightly before removing from pan.

6 - Make and apply the glaze. In a small bowl, mix confectioners' sugar, hot water, and almond extract until smooth and creamy. Dip the still-warm doughnuts into glaze and let excess drip off.

How to Make Donut, Part 2 : Fried Glazed Donuts


Ingredients for Fried Glazed Donuts
  • 2 (.25 ounce) envelopes active dry yeast
  • ¼ cup warm water (105-115°F or 40-45℃)
  • 1½ cups lukewarm milk
  • ½ cup white sugar
  • 1 teaspoon salt
  • 2 eggs
  • ⅓ cup shortening
  • 5 cups all-purpose flour
  • 1 quart (1 liter) vegetable oil for frying
For glaze:
  • ⅓ cup butter
  • 2 cups confectioner's sugar
  • 1½ teaspoons vanilla
  • 4 tablespoons hot water or as needed
Steps

1 - Mix the yeast and the warm water together in a small ramekin. The yeast needs warm water to activate; it will help the doughnut dough rise and stay fluffy. Let activate for 5 minutes.

2 - Mix yeast mixture, milk, sugar, salt, eggs, shortening, and 2 cups of the flour in a mixer on a low speed. Alternatively, you can use a wooden spoon and mix by hand, but be sure to mix the dry ingredients first, then the wet ingredients separately, and then combine the two.

3 - Beat in remaining flour, ½ cup at a time, at a low speed. Do this until the dough no longer sticks to the bowl.

4 - Knead the dough with your hands and knuckles for 5 minutes until the dough is smooth but elastic.

5 - Set the dough into a greased bowl to rise. Cover with a towel and let stand until dough doubles in volume (about 1 hour). Dough will be ready when you can press a finger into it and the indentation stays.

6 - On a floured surface, roll the dough out until it's about 0.5 inch (1.3 cm) thick. Cut with a floured doughnut cutter, or cut into doughnut shapes by hand.

7 - Let the doughnuts rise again until double their size (about 30-60 minutes). Lay them out on a tray and cover them with a large, clean towel.

8 - Prepare the glaze while doughnuts are rising. This is a classic butter glaze, not unlike the Krispy Kreme glaze that is popular in America. To make the glaze:
Melt butter in a saucepan over medium heat. Be careful not to burn the butter.
Take the butter off the iron and stir in confectioners' sugar and vanilla until smooth.
Stir in hot water one tablespoon at a time until the icing is thin, but not watery.

9 - Heat the oil in a deep fryer or skillet until oil reaches a temperature of 350℉ (175℃). Use a kitchen thermometer for maximum precision.
  • To avoid a greasy taste, heat the oil up on medium high for five minutes, and then gently reduce the heat until thermometer reads 350℉ (175℃).
10 - Slide the donuts into the oil carefully, with metal tongs or a spatula. Turn the doughnuts over when they float up to the surface. Fry evenly on both sides until golden brown.

11 - Remove doughnuts from oil and let drain on a wire rack. Make sure any excess oil drips off the doughnut before you glaze it.

12 - While doughnuts are still warm, dip doughnuts into the glaze, coating evenly. Set to dry on a wire rack and enjoy immediately.

Saturday, March 19, 2016

How to Make Chocolate Glazed Donuts

Donuts are a fun snack to prepare. Making them at home is a great way to spend quality time with family members of all ages. Donuts are essentially deep fried ring of dough; so they can be made easily at home.

Ingredients

For the Donuts:

For the Glaze:
  • ½ cup unsalted butter
  • ¼ cup whole milk
  • 1 tablespoon light corn syrup
  • 2 teaspoons vanilla extract
  • 4 ounces bittersweet chocolate
  • 2 cups confectioners' sugar

Part 1 : Making the Donuts

1 - Heat the oil to 375 degrees. Using medium-high heat pot, pour the oil and have it heat till it reaches 375 degrees. You can check the degrees by sticking a thermometer in the oil.

2 - Remove the biscuit dough from can. While waiting for the oil to heat up, remove the dough out separate, and lay them on a flat surface.

3 - Punch a hole in the center of the biscuits. Using a bottle top, punch small holes in the center of the biscuit dough.
  • The leftover biscuit dough can be fried and eaten as well. If you don't want to fry them, feel free to throw them out.
4 - Place each donut in the hot oil. Place the donuts in the oil and fry until golden brown and fluffy. Watch donuts fry when they're in the oil, they cook fast.

5 - Place on napkin to drain excess oil. Use tongs to remove the donuts and have them rest on a napkin. Allow to cool.

Part 2 : Making the Chocolate Glaze

1 - Place butter, corn syrup, vanilla extract, and milk in a pan and heat. Place all the ingredients (except the powdered sugar and chocolate) in a frying pan and heat until butter melts thoroughly.

2 - Add chocolate.Turn heat to low and slowly pour the chocolate. Whisk until texture is creamy.

3 - Add powdered sugar. Remove from heat and add the powdered sugar. Whisk again until uniform texture is achieved.

4 - Let it sit for 30 minutes. To keep the glaze liquid and creamy, pour glaze into a bowl and place the bowl of glaze into a larger bowl filled with warm water.

Part 3 : Glazing the Donuts

1 - Spread glaze onto donuts. Using an icing spatula, spread the glaze over each donut.
In addition to spreading the glaze, you can drizzle just a little or dip the whole donut in the bowl.

2 - Allow to dry. Have the donut glaze set and dry until it hardens.

3 - Enjoy!

4 - Finished.

How to Make Donut, Part 1 : Canadian Fried Dough

Doughnuts come in all shapes and sizes. They are the perfect way to treat yourself on a lazy weekend, or to indulge in a baking adventure. Store-bought doughnuts are great, but homemade ones are even better.

Here are three distinctive doughnut recipes to whet your appetite. Enjoy!
  • Prep time (Fried Glazed): 2 hours, 30 minutes
  • Cook time: 15 minutes
  • Total time: 2 hours, 45 minutes

Ingredients for Canadian Fried Dough
  • ½ cup warm water (110° F or 45° C)
  • 5 teaspoons active dry yeast
  • 1 pinch white sugar
  • 1 cup warm milk (110° F or 45° C)
  • ⅓ cup white sugar
  • 1½ teaspoons salt
  • 1 teaspoon vanilla extract
  • 3 beaten eggs
  • ⅓ cup vegetable oil
  • 5 cups whole-wheat flour, divided
  • 1 quart vegetable oil for frying

For dusting:
  • 2 cups white sugar
  • ½ teaspoon ground cinnamon, or to taste
1 - In a large bowl, mix yeast, warm water, and pinch of sugar until foam begins to show (about 5 minutes).

2 - Into the yeast mixture, stir in milk, ⅓ cup sugar, salt, vanilla extract, eggs, and ⅓ cup vegetable oil. Stir until the sugar has dissolved.

3 - Mix in about 2½ cups of the whole-wheat flour. Stir until the dough is too stiff to add more flour. Turn the dough out onto a floured surface, and begin to knead in more flour until the dough is no longer sticky. Continue kneading until dough is smooth and elastic (about 10 minutes).

4 - Form the dough into one big ball, place into a greased bowl, and cover. Let rest until the dough has doubled in size, about 1 hour.

5 - Place the dough back on a well-floured surface and knead again to reshape it. Break off a piece of dough roughly the size of a heaping tablespoon.

6 - Shape the heaping tablespoon of dough into a thin strip or an oval shape. You can use a rolling pin or your hands. The dough should be 0.25 inch (0.6 cm) thick. In Canada, fried dough is often called "Beaver Trails," so let your imagination run wild!

7 - Place rolled bits of dough under a cloth to rise while you shape the remainder of the dough.

8 - Heat oil in a deep fryer or large skillet to 375℉ (190℃). Oil should be at least 4–5 inches (10.2–12.7 cm) deep in your fryer or skillet.

9 - While oil is heating, combine 2 cups of sugar with cinnamon and set aside for dusting.

10 - Gently introduce pastries into the frying oil, one at a time, cooking for 1-2 minutes per side, until golden brown. Remove onto a wire rack.

11 - Remove excess oil from fried pastries with paper towels. Dip each pastry into the cinnamon sugar mixture while still warm.

12 - Enjoy.

Making Basic Sandwich Bread


1 - Assemble your ingredients. Sandwich bread works in basically the same prep process as the French bread, but with a few more ingredients to give it a sweet, soft, texture. Additions or alternative ingredients will be suggested throughout, but for the basic starter sandwich bread, you'll need:

  • 6 cups all-purpose flour (white or whole wheat)
  • 1 cup water
  • 1 cup milk
  • 2 tablespoons of unsalted butter
  • 2 tablespoons of sugar or honey
  • 1 tablespoon of salt
  • oil (optional)
  • 1 egg, beaten (optional)


2 - Activate the yeast. Using 1 cup of warm water (100-110 deg. F), sprinkle the yeast into the bowl of a standing mixer or a large mixing bowl and cover it with water to let it activate.

3 - Scorch the milk in a saucepan. Heat the milk quickly on the stove over high heat, until just before it boils, then take it off the heat and add in the butter and the sugar, mixing it thoroughly. You don't want to actually burn the milk, and be careful that it doesn't boil over, since milk tends to start frothing very quickly. Keep an eye on it and take it off the heat as soon as it starts to steam. Let it cool down slightly before you add it to the yeast.

  • Alternatively, it's perfectly fine to heat the milk in the microwave and add the butter and sugar when it's hot.


4 - Add the wet mix and 1 cup of the flour to the mixer. Stir the mixer for about 2 minutes at medium speed. As the dough starts to form, gradually continue adding in the rest of the flour, one cup at a time. When all the flour has been added, beat on a higher setting for 2 more minutes.

  • How much flour you use will depend on how humid it is, so keep an eye on the dough and use your judgment. Wheat flour is likewise very different to work with--you'll likely need to use less of it to form the dough. When you're first starting out, it might be a good idea to use half wheat and half white flour to get used to the difference.


5 - Turn out the dough and start kneading. Press all the leftover crumbs of flour into the dough ball, then turn the lump out onto your floury kneading surface. Keep kneading until the dough has a soft, smooth surface texture that springs back when you push into it.

  • Alternatively, it's perfectly fine to knead in your electric mixer, provided you've got a bread hook. It can be much easier on the hands. Knead the dough in the mixer for about 10 minutes to form the gluten strands that'll give the bread a wonderfully chewy texture.


6 - Cover the ball of dough with oil, and put it in an oily bowl. This stops the surface from drying out and cracking while it rises--the dried dough will become nasty lumps in your finished bread. Cover the bowl with a clean dish towel or plastic wrap and put the bowl in a warm (but not hot) location.

  • Leave the dough alone for about 90 minutes while it rises. It should about double in size, or at least plump up significantly if you're using a lot of wheat flour.


7 - Punch it down. Put your fists on the ball of dough and squish it until it's about the size you started with. You don't need to knead it again, as the dough should be soft and springy. Divide the dough into two equal portions with a chef's knife or a pastry knife to form your loaves.

8 - Roll two loaves and to greased loaf pans. On your kneading surface, roll out the dough with your hands by flattening it first into a kind of tall rectangle, then folding the bottom and top in toward the middle and pinching the seam closed. This will make the bottom of the loaf.

  • Add the loaves into the greased pans and cover the pans again with the towel to let the dough rise again for 30-45 minutes while you clean up the kneading surface and preheat the oven.


9 - Bake the bread at 400 °F (200 °C) for 35 minutes or until golden brown. Before adding the bread into the oven, slit the dough 3 or 4 times about a half inch deep to score the surface, then top with beaten egg or oil if you want to create a shiny crisp top crust.

  • The bread is finished when the bottom of the loaf is firm, and you're able to make a hollow tapping with your finger. If you're not sure, turn it out of the pan and check by tapping on it with your finger a few times. It'll be hot, so be careful.

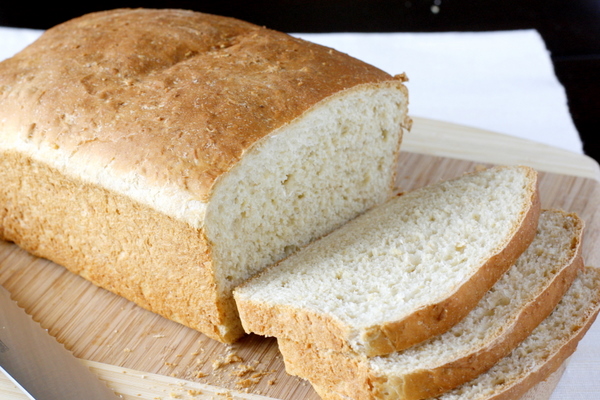
Homemade White Bread

Do you know how to knead? Do you know when to stop kneading? Thomas Joseph will answer all these questions and much more as he takes you step-by-step through the process for making a delicious homemade white bread.


Ingredients
  • 1 1/2 tsp 7 grams active dry yeast
  • 1/4 Cup warm water
  • 1 1/2 tsp sugar
  • 1 3/4 cup bread flour
  • 1 1/2 tsp salt
  • 1 cup warm water
  • 1 3/4 cup bread flour
  • 2 tbsp unsalted butter

Wot!!.. No Egg??!

By Andrea Wren
One of the first things that anyone who is curious about vegan baking wonders, is what do you use instead of eggs?

It certainly seems to be the thing that baffles most people when it comes down to experimenting with vegan baking.

Of course, vegan baking is more than being just egg-free, it's also dairy-free (no butter or milk) and otherwise animal-derivative free (no gelatine or honey, for example).

And because I'm keen to show that vegan baking is as easy as making warm, home-baked apple pie, I've put together 'Wot, No Eggs?! The Beginner's Guide To Becoming An Expert Vegan Baker' especially for you!

This is a FREE 16 PAGE ebook which sets out to de-mystify vegan baking, and provide you with valuable insider tips, information on how to repace eggs and dairy, as well as recipes and resources.

All you have to do to claim my book is sign up with your email below, hit the GO button, and after activating your subscription, the download of my ebook will be sent to your inbox!

Download : The Beginner's Guide To Becoming An Expert Vegan Baker

Friday, March 18, 2016

Eggless Homemade Ladi Pav

Ladi Pav, Pav Bread or Buns. Whatever You Name It but Now a days they are our basic need like Roti ! Its Bit difficult to make it at Home but here i have tried best of me for you people to make it soft, fluffy, moist, spongy pav buns without any eggs and any stabilizer or any chemical.


Now, Always enjoy Pav Bhaji, Vada Pav, Misal Pav, And Dabeli With This Awesome Buns. After making and testing it, I am damn sure. You wont ever buy it from market and prefer to make it at Home ! Enjoy !

Recipe for 9 buns.

Ingredient :
  • 250 gms all purpose flour
  • 1 tsp dry instant yeast
  • 2 tsp sugar
  • 1 tsp improver powder
  • 4 tsp butter
  • 4 tsp milk powder
  • 1/ 2tsp Salt.

- Yesha

Wednesday, March 16, 2016

Eggless Ladi Pav Without Oven

Eggless Ladi Pav Without Oven - Feather Soft Buns Recipe In Cooker - Eggless Baking Without Oven.

Ingredients
  • Milk - 100ml
  • Yeast - 1 Tsp
  • Sugar - ½ Tbsp
  • Maida / Plain Flour - 125g / 1 Cup
  • Salt - ½ Tsp
  • Milk Powder - 1 Tbsp / 9gms
  • Butter - 10 gms / 2 tsps
  • Milk & Butter - For Brushing
  • Salt - 2 Cups for Baking


Instructions
  1. To the warm milk, add the sugar and the yeast. Stir and keep aside to proof for 10 mins.In your working platform, place the flour, salt and the milk powder. 
  2. Mix and make a well in center.Add the proofed yeast mixture, which would have been frothy so far. Get your hands in and form this into a soft-pasty kind of dough.
  3. If the mixture does not turn out to be soft and pasty-sticky consistency, add more milk to it and make it sticky and soft.
  4. Add in the butter and start kneading it. Knead this by pushing the dough with heel of your palm.. This is going to be very sticky and kind of paste like, but this is how it is supposed to be. 
  5. Just keep kneading and scraping once in a while for 15 minutes.
  6. After about 15 mins of kneading, this will come together and would be more like a dough than a sticky pasty mass.Place this into a bowl with a lil bit of oil, coat the dough and the bowl with the oil, cover with a damp cloth and let it proof for 1 hour or until doubled in a warm spot.
  7. Once doubled in volume, punch and take the dough out, sprinkle a bit of flour and knead for a minute.Divide the dough into 6 equal portions. My dough weighed 245 grams. And I portioned about 40gms each.
  8. Smooth-en out each portion by rolling them between your palm and fingers. Place the shaped portions in a 6" square cake tin. You can make in a round one as well.Cover the cake tin with a cloth and let the pavs proof for another hour or until well risen.
  9. For Baking Without Oven, I recommend to use a large Pressure Cooker. 
  10. Remove the Rubber Gasket and Whistle.Add 2 cups of salt, a wire stand and a perforated plate. 
  11. Cover and heat in Medium-High Flame. Quite on the higher side. Preheat for 10 minutesOnce the pavs are well risen, and are parallel or above to the tin's height. 
  12. Brush them with milk.Using a tong, place the tin inside the cooker and quickly close the lid/cover.
  13. Bake these for 15-18 minutes in Medium-High Flame.(Read Notes)Take them out once they're baked well.. Brush the tops with butter. 
  14. Now take a damp cloth and cover the tin for a minimum of 30 minutes.(Read Notes)Using a knife, loosen the sides and carefully take the pavs out..Pavs are ready.. Freshness to vouch for - smells, looks, and tastes heavenly! Enjoy!


Notes
  • Making Ladi Pav or any Bread at home isn't difficult. But can get tricky when making without oven. Here are a few points for you to look at:
  • -> The size and the height of the tin matters. Make sure the height of the cake tin is no more than 2". You want the pavs when prooved to be parallel or above the tin's height for them to brown well inside the cooker.
  • -> Flame : The flame that we use to bake cakes is low-med quite on the low side. But for baking these pav, you need to have the flame in med-high. Quite on the higher side. 
  • -> Browning : A good brushing of milk is usually enough for it. But, But, if you are not confident whether they will brown well or not, you can add a pinch of sugar and mix the sugar in the milk and then brush the pavs. The sugar will help in browning much better. But be careful, too much sugar can lead to over-browning/burning. Just a pinch is good.
  • -> Make sure to remove the gasket/rubber thing of your pressure cooker. 
  • -> As the heat is going to be quite on the higher side, be careful. And i will suggest to use old salt. I mean, use salt that you have used earlier to bake something else.