Sunday, March 20, 2016

Making Heavy Cream


Many popular recipe ingredients have easy homemade substitutions. If your recipe calls for heavy cream and you don't have any, don't worry. You can make your own heavy cream substitute with just a few simple ingredients in a matter of minutes! Note: unlike store-bought heavy cream this recipe will not beat into whipped cream.

Ingredients

  • 3/4 cup whole milk
  • 1/3 cup butter

Steps

1 - Melt the butter. Start with butter than has been thawed to room temperature. There are a few different ways to melt the butter. Here are some methods to consider:

  • Melt it on the stove. Put your butter in a skillet and turn the heat on low. Butter melts between 82 and 97ºF (28–36ºC), which can be about room temperature on a hot day. Keep an eye on your butter and remove it from heat when about 3/4 of the butter has melted. Use a spoon or spatula to spread the butter over the bottom of the pan as it melts.
  • Melt it in the microwave. Chop the butter into small pieces and place it in a microwave-safe container for about 10 seconds at a time until melted.

2 - Pour the melted butter into the milk. In a medium bowl, mix together 1/3 cup butter (melted) and 3/4 cup whole milk. Make sure you have let your butter cool before pouring it into the milk
If you prefer to use milk with a lower fat content you'll need to add 1 tbsp of flour to help your cream thicken.

3 - Whisk your ingredients together. Whisk together with an electric mixer, handheld whisker, fork, or spoon. Mix for several minutes until the cream is thick and frothy.

  • Be aware that this homemade heavy cream will not whip into whipping cream like store-bought heavy cream will.

4 - Store your heavy cream (optional). Place your heavy cream into a covered container in the refrigerator and store for 1 to 2 days.

5 - Use your homemade heavy cream. You can substitute this 1 cup (236ml) of homemade heavy cream in baked goods, soups, and savory sauces immediately.
التاجر الخبز الفرَّانُ

"خذ الحكمة ولو من فهم البهآئم"

How to Make a Tortilla Cheese Roll Up


A cheese roll-up is wonderful and easy snack to eat on a relaxing day, and this wonderfully made article will show you how to make a yummy cheese roll up.

Ingredients
  • Tortillas
  • Shredded cheese
  • Sour cream (optional)
Steps

1 - Gather up your ingredients. The ingredients are really easy to find at Walmart or a local grocery store.

2 - Rip off a paper towel and lay it down on a flat surface.

3 - Sprinkle the cheese on the tortilla. Sprinkle as much cheese as you want on it. It's your choice!

4 - Wrap the tortilla up. Wrap it as tight as you can.

5 - Put the roll-up in your microwave for 15 seconds.

6 - Let it cook thoroughly. If it's not cooked thoroughly, let it cook for extra time.

7 - Finished
التاجر الخبز الفرَّانُ

"خذ الحكمة ولو من فهم البهآئم"

Chinese Rice dumping ( Bak Zhang )


Ingredients: 
500gm glutinous rice (soak overnight and drain dry)
150ml cooking oil or lard ( about 10 tbsp)
½ tablespoon salt

250 ml of water- water just barely enough or less  to cover the surface of rice

The fillings: - as desired


Method:
1. Sock the rice for at least 2 hours or overnight. Drain dry.
2. Fry the drain rice in a pan with some oil for about 10 mins.
3. Put the rice in a cooking pan and add water to just barely enough or less cover the surface of the rice, or less. Too much water will make the rice soggy.
3. Steam the rice for about 10-12 mins (half cooked)
4. Transfer rice to a basin/cake tin and fluff the rice with a fork . Add in salt  while still hot and mix with 10 tablespoons of lard or oil..  Mix well.
5. Leave aside to cool before assemble 

To assemble the cake:     Scald or immersed the bamboo leaves in boiling water to soften them.
For each cake, take one or two  leaves and roll into a triangular shape. Put in  the compacted steamed rice and fill the centre with 2 teaspoon of fillings as desired. Fold over leaves and use strings ( e.g. from banana tree) to bind together.
Put the assemble cake into a pot and boil for another 20 minutes.

Wrapping rice dumping


Tip:- Pandan leaves for wrappings this cake should be the wider type. The ordinary ones sold in market or use for cooking agar agar will need 2 leaves as in the recipe but is not so easy to wrap.
Nylon string used for tying things can be used. These are divided into 4 or 5 strands each strings ( as they are quite strong )and washed and dried.
التاجر الخبز الفرَّانُ

"خذ الحكمة ولو من فهم البهآئم"

Akaline Red Bean Rice Dumpings


Ingredients
500g glutinous rice, rinsed and soaked for at least 4 hours
1¼ tsp alkaline water (kan sui)
Dried bamboo leaves, boiled till soft and wiped dry
Red bean paste filling
250g red beans, washed and soaked overnight
200g castor sugar
150ml oil

Method
To prepare red bean paste
Cook beans in a pot of water till soft. Drain off the liquid and blend or process the cooked beans to form a smooth paste.
Put the bean paste in a non-stick saucepan and cook until dry. Add sugar and stir until sugar dissolves, then add in oil. Stir slowly until the mixture turns into a smooth paste. Remove the paste and allow it to cool completely. Divide the red bean paste to make very small balls.

For the dumplings
Mix the glutinous rice with the alkaline water for about 15 minutes.
Take 2 bamboo leaves and fold into a cone. Put a tablespoon of rice in the cone and add a ball of red bean paste. Cover with more glutinous rice. Shape the cone well and secure with hempstring. Repeat the process to make more dumplings.
Boil the dumplings in rapidly boiling water for 3½-4 hours. Drain the dumplings well before serving.

See how to : Wrapping Rice Dumping
التاجر الخبز الفرَّانُ

"خذ الحكمة ولو من فهم البهآئم"

Red Bean Filling ( Tau Sar Filling)


Ingredients
1 1/2 cups red beans, washed well
4 cups water
1/2 cup vegetable shortening
1 cup sugar


Method.
1. Soak  beans with water overnight . This helps shorten the cooking time.
2. The next day, bring the beans and water to a boil. Simmer for 1 ½ - 2 hours, until the beans have softened, adding more water as necessary. Drain. Make sure always have just enough water to cover all the beans.
3. Blend them into a puree in a hand held blender or food processor.


4. Press the puree through a sieve, discarding the skins, which will be left in the sieve.
5.  Place the thickened puree back into a saucepan, together with the sugar and vegetable shortening, and heat over low heat, stirring until it becomes a thick paste. Stir and scrape vigorously so that it does not stick to the bottom.
6. Remove from heat and let cool before filling buns.

*Stored in a sealed container in the refrigerator, homemade sweet red bean paste will last for approximately 1 week.
التاجر الخبز الفرَّانُ

"خذ الحكمة ولو من فهم البهآئم"

Glutinous Rice Gelatinized Bread


This is another method to create a soft and fluffy even after many days using glutinous rice flour in the starter dough. May also be baked as a whole loaf without any fillings.


Ingredients for Glutinous Flour Gelatinized:
  • 2 2/3 tbsp glutinous rice flour 糯米粉
  • 4 tbsp water
  • 1/2 cup bread flour
Method :
  1. Combine glutinous rice flour and water, mix well.
  2. Heat the mixture over low heat until thicken, off the heat immediately once the mixture started to thicken and keep stirring until it turns gluey.
  3. Stir in  Bread flour gradually and mix to form a dough.
  4. Then leave to cool before adding into the main ingredients.


Ingredients of Main Dough :
(A)
  • 1 eggs, beaten
  • 1/3 cup water
  • 1 1/3 tsp honey

(B)
  • 2 tsp yeast
  • 3 1/3 tbsp sugar
  • 1/3 tsp salt
  • 2 2/3 tbsp milk powder
  • 1 2/3 cup bread flour

(C)
  • 27gm cold butter, cubed
  • 2 tsp corn oil


Method :
1.  Combine ingredients (A) & gelatinised dough pieces into ingredients (B), mix to form a soft dough.
2.  Then add in ingredients (C) and knead till the side of mixing bowl is clean.
3.  Leave the dough to rest for 1½ - 2 hour or until double in size.
4.  Punch to knead out the air and must be handle with care cause the dough is pretty sticky. Dust on extra flour if needed.
5.  Then divide dough into 13 equal portions and fill with Red bean paste filling.
6.  Sealed and place them to a 5x9" tray with butter coating.
7.  Again let to rest for another 1-1½ hour or until double it's size.
8.  Brush on egg glazing and sprinkle the top with sesame seeds.
9.  Bake at preheated oven 175-180'C for about 20 mins or until golden brown.
10 .Leave to cool complete before serving.


*If you want the buns to look more attractive and appetizing, you can glaze them while they are still
hot with butter, margarine, apricot gel, egg white or sugar syrup.
( Cook 1part of sugar with 2 parts of water till boiling).

As a Bread loaf- skip step 5.and divide dough into 4  portions. Shape into oval shape
and continue on step 6.

التاجر الخبز الفرَّانُ

"خذ الحكمة ولو من فهم البهآئم"

Roti Paun ( Red Bean Paste or Butter milk )


*makes 18pcs of roti paun and extra with few buns

Gelatinised dough
  • 100g bread flour
  • 70ml hot boiling water

Steps
  1. Place  Bread flour in a mixing bowl.
  2. Add hot boiling water and mix with wooden spoon to form a rough dough..
  3. Cover bowl with cling film and leave dough to cool in the fridge for at least 1 hour or up to 48 hours

To prepare Basic sweet bread dough
  • 300g bread flour
  • 100g plain flour
  • 80g sugar
  • 1 tbsp instant yeast
  • ½ tsp salt
  • 175ml cold milk
  • 1 cold grade A egg
  • 60g cold butter, cubed
Steps
  1. Combine flours, sugar, yeast and salt together in a mixing bowl.
  2. Tear the gelatinized dough into pieces and add to the bowl along with the eggs
  3. Using a stand electric mixer, mix on low speed, adding cold milk gradually.
  4. Mix until dough is well combined and leave the sides of bowl.
  5. Add in the cold butter cubes and mix on medium speed until dough is smooth. Leave stand to prove for 2 hour or until double in size.
  6. Shape dough into a ball, leave to proof for  another 30-60mins.


To assemble Roti Paun
  1. Divide and shape bread dough into a small ball weighted 30g each.
  2. Spoon 1tsp of butter filling and wrap inside the small dough ball.* See below
  3. Place dough ball in a greased 9” round cake tin (removable base).
  4. Once completed, set aside to rest for 15mins.
  5. Apply egg wash on top of the dough balls.
  6. Bake at preheated oven at 180c for 20-25 mins.

Click how to make Red Bean Paste  or  here

Variations 


Butter milk fillings
  • 70g butter
  • 30g icing sugar *
  • 1/8 tsp salt
  • 30g whole egg (about half egg)*
  • 1 tbsp cornflour (can add more)
  • 80g skimmed milk powder

*you can use the other ½ egg for egg wash. 


Method:
  1. Cream butter, sugar and salt until creamy.
  2. Add in egg in batches mixing well each time.
  3. Put in corn flour and skimmed milk powder, mix well with rubber spatula. Add more corn flour if dough is still too soft or watery depending on your egg size.

* Careful to seal buns well to prevent leaking when baked.  Make the same mistake twice. 
*If you want the buns to look more attractive and appetizing, you can glaze them while they are still
 hot with butter, margarine, apricot gel, egg white or sugar syrup.
 ( Cook 1part of sugar with 2 parts of water till boiling).
التاجر الخبز الفرَّانُ

"خذ الحكمة ولو من فهم البهآئم"

Active dry yeast and instant yeast


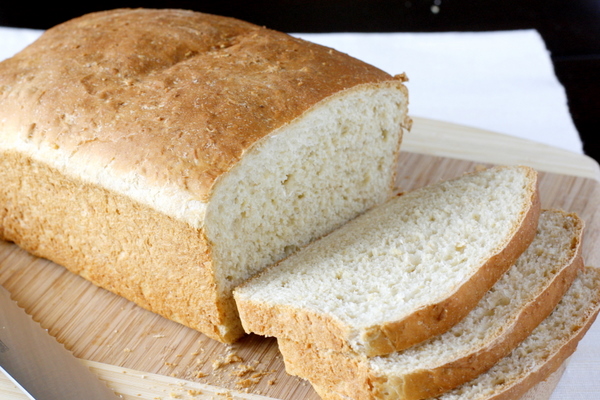
Nearly all breads and pastries will perform equally well with any of the available yeast products (fresh, active dry, quick rise, or instant). Active dry yeast, developed about 150 years ago, is sold in sealed, foil-lined packets. But in the packaging process, about 25% of the yeast cells die off, releasing a small amount of glutathione, which causes relaxation of gluten (this makes it a good yeast for pizza dough, but it’s not ideal for all dough products).


Instant yeast, also called quick rise or rapid rise, came along about 30 years ago and has become more popular as its availability has increased. Because none of the yeast cells die during packaging, it requires 25% less instant yeast than active dry yeast to leaven a loaf. The biggest advantage of instant yeast is that it dissolves directly in dough without having to be hydrated in warm water the way active dry yeast often does. (The mini baguette recipe uses active dry yeast without first hydrating it, but it works in this case because the dough is exceptionally wet.)


Fresh yeast, also called compressed or cake yeast, is sold refrigerated in foil-wrapped blocks and cubes. It’s a moist product and has a limited shelf life of about three weeks, even if refrigerated. It is also harder to find for home baking. Professional bakers have traditionally liked this type of yeast because it’s what they learned to bake with, but many of them are now switching to instant yeast because of its extended shelf life and ease of use.

What is the difference between active dry yeast and instant yeast (also known as bread machine yeast)? Instant yeast is a little more potent than active dry yeast and can be mixed in with your dry ingredients directly. I generally find it easier to work with. Active dry yeast works just as well as instant yeast, but requires being activated in a little bit of warm water before being added to the rest of the ingredients. Failure to properly activate it will result in your loaf not rising adequately.

Can I substitute active dry yeast for instant yeast in my recipe (or vice versa)? Yes. If you are substituting active dry yeast for instant yeast in a recipe, read the instructions on the package to figure out how to activate the yeast before adding it to the recipe and reduce the amount of water you add later in the recipe by the amount of water you proof the yeast in (i.e., if you activate the yeast in a half a cup of water, add a half a cup of water or milk less later so that you end up with the same total amount of liquid in the recipe).

You may also want to add about 20 percent more yeast to the recipe than what is called for, although using less yeast and letting it rise more slowly will result in a more flavorful loaf. If you are substituting instant yeast for active dry yeast, you can reduce the amount of yeast you use in your recipe by approximately 20 percent. Be sure not to forget to increase the amount of water you add to the dry ingredients by the amount that you would proof the active dry yeast in, so that you end up with the same total amount of liquid in the recipe.

What about fresh yeast?Professional bakers often use fresh yeast. If you encounter a recipe that uses fresh yeast, divide the weight by 3 to calculate the proper amount of instant yeast to use.

Sometimes when I make bread (especially brioche) I notice a very strong, unpleasant alcohol taste in the finished loaf. What causes this and how can I avoid it?

What you are smelling is yeast fermentation—the conversion of sugars into alcohol and carbon dioxide. When dough overferments, it gives off a stale beer smell. Some of this alcohol will bake off, but some of it may remain in the finished bread. Dough made with a high percentage of yeast and sugar, such as brioche and other soft, rich bread products, are more vulnerable to overfermentation than crusty breads such as French or Italian bread, which use small percentages of yeast.

If your bread is overfermenting it may be because the dough is too warm or, if kept overnight in the refrigerator, it did not cool down quickly enough to stop the fermentation. Try making the dough with colder water or reduce the yeast by about 10%. Brioche, especially, should be chilled immediately after mixing to control the fermentation.

Quick Instant Yeast Conversion Table
  • 1 g = ¼ tsp
  • 2 g = ½ tsp
  • 3 g = ¼ tsp+½ tsp
  • 4 g = 1 tsp
  • 5 g = 1 ¼ tsp
Summary 
  • Cake (moist) - the traditional live yeast; needs to be dissolved in water
  • Active dry - the traditional dry yeast; needs to be dissolved usually with a bit of sugar
  • Instant - contains a bit of yeast enhancer (citric acid, maybe some other stuff?) and is possibly more concentrated than active dry; does not need to be dissolved
  • Bread Machine - exactly the same as instant in a different package
  • Rapid Rise - larger amount of yeast enhancers and other packaging changes to the granules. Does not have to be dissolved. Works very fast and is intended for straight doughs that you want to complete within an hour or so. Generally not used by artisan bakers who seek slower, not faster, rise.
التاجر الخبز الفرَّانُ

"خذ الحكمة ولو من فهم البهآئم"

Making White Bread ThangZhong


Ingredients:
  • 1/2 Cup (120ml) water
  • 1/4 Cup (24g) Bread Flour
Bread Dough Ingredients:
  • 1/2 Cup  Milk
  • 1/2 Teaspoon Salt
  • 3 Tablespoon Sugar
  • 3 Tablespoon Melted Butter
  • 1 1/2 Cup Bread Flour*
  • 1 1/3 Teaspoon Active Dry Yeast*  I used instant yeast see below
* If instant yeast is used, reduced the yeast by 20% and add extra tsp of sugar to avoid the yeast smell of over fermentation. (1tsp instant yeast Plus 1tsp sugar)

To Make The TangZhong

Whisk the bread flour and the water together in a heat proof saucepan. Heat the mixture at low heat till it thickens .(about 2-3 mins), continually stirring till the mixture start to have “lines ”- gluey and starchy

Transfer to a bowl and cover loosely with plastic wrap to prevent from drying and after completely cool down you can start using it or keep in the fridge for up to 48hrs..

To Make The Bread:
  1. 1. Take out the TangZhong from the fridge at least an hour before use.
  2. 2. In a mixing bowl, add in warm milk, TangZhong, salt, sugar, butter, bread flour and yeast. Add more flour if dough is too sticky. Knead the dough for 15 to 20 minutes and proof it for 1½ - 2 hour until the dough double in size
  3. When dough is ready, punch down to deflate it. Divide dough into 4 equal portions. Leave them in a warm place to rest for 15-20 mins.
  4. Knead each dough a few times and shape each into an oval shape. Place them diagonally into a 9 x 5 inch loaf pan . Let dough proof the 2nd round for 1-1½  hours in a warm and moist place or double in size.
  5. Preheat oven 180°C / 355°F. and bake for 23-25 mins.
التاجر الخبز الفرَّانُ

"خذ الحكمة ولو من فهم البهآئم"

How to Make Donuts, Part 3 : Baked Glazed Donuts


Ingredients for Baked Glazed Donuts
  • 2 cups all-purpose flour
  • ¾ cup white sugar
  • 2 teaspoons baking powder
  • ¼ teaspoon ground nutmeg
  • ¼ teaspoon ground cinnamon
  • 1 teaspoon salt
  • ¾ cup milk
  • 2 eggs, beaten
  • 1 teaspoon vanilla extract
  • 1 tablespoon shortening (or 2 tablespoons melted butter)
For glaze:
  • 1 cup confectioner's sugar
  • 2 tablespoons hot water
  • ½ teaspoon almond extract

Steps

1 - Preheat your oven to 325℉ (165℃). Lightly grease a doughnut pan.

2 - Into a large bowl, sift together flour, sugar, baking powder, nutmeg, cinnamon and salt.

3 - Stir milk, eggs, vanilla, and shortening together before incorporating into dry mix. Beat the batter together until well blended.

4 - Fill the doughnut pan so each cup is ¾ full. The doughnuts will rise as they bake in the oven.

5 - Bake the doughnuts for 8-10 minutes, until they are springy when touched. Allow to cool slightly before removing from pan.

6 - Make and apply the glaze. In a small bowl, mix confectioners' sugar, hot water, and almond extract until smooth and creamy. Dip the still-warm doughnuts into glaze and let excess drip off.
التاجر الخبز الفرَّانُ

"خذ الحكمة ولو من فهم البهآئم"

How to Make Donut, Part 2 : Fried Glazed Donuts


Ingredients for Fried Glazed Donuts
  • 2 (.25 ounce) envelopes active dry yeast
  • ¼ cup warm water (105-115°F or 40-45℃)
  • 1½ cups lukewarm milk
  • ½ cup white sugar
  • 1 teaspoon salt
  • 2 eggs
  • ⅓ cup shortening
  • 5 cups all-purpose flour
  • 1 quart (1 liter) vegetable oil for frying
For glaze:
  • ⅓ cup butter
  • 2 cups confectioner's sugar
  • 1½ teaspoons vanilla
  • 4 tablespoons hot water or as needed
Steps

1 - Mix the yeast and the warm water together in a small ramekin. The yeast needs warm water to activate; it will help the doughnut dough rise and stay fluffy. Let activate for 5 minutes.

2 - Mix yeast mixture, milk, sugar, salt, eggs, shortening, and 2 cups of the flour in a mixer on a low speed. Alternatively, you can use a wooden spoon and mix by hand, but be sure to mix the dry ingredients first, then the wet ingredients separately, and then combine the two.

3 - Beat in remaining flour, ½ cup at a time, at a low speed. Do this until the dough no longer sticks to the bowl.

4 - Knead the dough with your hands and knuckles for 5 minutes until the dough is smooth but elastic.

5 - Set the dough into a greased bowl to rise. Cover with a towel and let stand until dough doubles in volume (about 1 hour). Dough will be ready when you can press a finger into it and the indentation stays.

6 - On a floured surface, roll the dough out until it's about 0.5 inch (1.3 cm) thick. Cut with a floured doughnut cutter, or cut into doughnut shapes by hand.

7 - Let the doughnuts rise again until double their size (about 30-60 minutes). Lay them out on a tray and cover them with a large, clean towel.

8 - Prepare the glaze while doughnuts are rising. This is a classic butter glaze, not unlike the Krispy Kreme glaze that is popular in America. To make the glaze:
Melt butter in a saucepan over medium heat. Be careful not to burn the butter.
Take the butter off the iron and stir in confectioners' sugar and vanilla until smooth.
Stir in hot water one tablespoon at a time until the icing is thin, but not watery.

9 - Heat the oil in a deep fryer or skillet until oil reaches a temperature of 350℉ (175℃). Use a kitchen thermometer for maximum precision.
  • To avoid a greasy taste, heat the oil up on medium high for five minutes, and then gently reduce the heat until thermometer reads 350℉ (175℃).
10 - Slide the donuts into the oil carefully, with metal tongs or a spatula. Turn the doughnuts over when they float up to the surface. Fry evenly on both sides until golden brown.

11 - Remove doughnuts from oil and let drain on a wire rack. Make sure any excess oil drips off the doughnut before you glaze it.

12 - While doughnuts are still warm, dip doughnuts into the glaze, coating evenly. Set to dry on a wire rack and enjoy immediately.
التاجر الخبز الفرَّانُ

"خذ الحكمة ولو من فهم البهآئم"

How to Work With Yeast in Bread Making


Handmade loaves of bread are a treat anytime and easy to make once you learn how to gauge the warmth the liquid should be in order for the dough to rise.

Ingredients
  • Flour
  • Fresh yeast
  • Water or milk
  • Salt
Steps

1 - Make sure you use yeast well within its freshness dates. This can be found either on the back of the paper packages or on the lid of the jar type.

2 - Use milk or water that is warm so it will activate the yeast and begin to rise. The temperature needed is generally between 120 degrees and 130 °F (54 °C).

3 - Note that non-instant yeast, known as granular yeast, the temperature should be between 90 to 110 °F (32 to 43 °C).

4 - Test the liquid with your finger tips, it should feel warm but not hot.

5 - To avoid cooling if butter is used, it should be added to the flour mixture directly.
التاجر الخبز الفرَّانُ

"خذ الحكمة ولو من فهم البهآئم"

Saturday, March 19, 2016

How to Make Chocolate Glazed Donuts


Donuts are a fun snack to prepare. Making them at home is a great way to spend quality time with family members of all ages. Donuts are essentially deep fried ring of dough; so they can be made easily at home.

Ingredients

For the Donuts:

For the Glaze:
  • ½ cup unsalted butter
  • ¼ cup whole milk
  • 1 tablespoon light corn syrup
  • 2 teaspoons vanilla extract
  • 4 ounces bittersweet chocolate
  • 2 cups confectioners' sugar

Part 1 : Making the Donuts

1 - Heat the oil to 375 degrees. Using medium-high heat pot, pour the oil and have it heat till it reaches 375 degrees. You can check the degrees by sticking a thermometer in the oil.

2 - Remove the biscuit dough from can. While waiting for the oil to heat up, remove the dough out separate, and lay them on a flat surface.

3 - Punch a hole in the center of the biscuits. Using a bottle top, punch small holes in the center of the biscuit dough.
  • The leftover biscuit dough can be fried and eaten as well. If you don't want to fry them, feel free to throw them out.
4 - Place each donut in the hot oil. Place the donuts in the oil and fry until golden brown and fluffy. Watch donuts fry when they're in the oil, they cook fast.

5 - Place on napkin to drain excess oil. Use tongs to remove the donuts and have them rest on a napkin. Allow to cool.

Part 2 : Making the Chocolate Glaze

1 - Place butter, corn syrup, vanilla extract, and milk in a pan and heat. Place all the ingredients (except the powdered sugar and chocolate) in a frying pan and heat until butter melts thoroughly.

2 - Add chocolate.Turn heat to low and slowly pour the chocolate. Whisk until texture is creamy.

3 - Add powdered sugar. Remove from heat and add the powdered sugar. Whisk again until uniform texture is achieved.

4 - Let it sit for 30 minutes. To keep the glaze liquid and creamy, pour glaze into a bowl and place the bowl of glaze into a larger bowl filled with warm water.

Part 3 : Glazing the Donuts

1 - Spread glaze onto donuts. Using an icing spatula, spread the glaze over each donut.
In addition to spreading the glaze, you can drizzle just a little or dip the whole donut in the bowl.

2 - Allow to dry. Have the donut glaze set and dry until it hardens.

3 - Enjoy!

4 - Finished.
التاجر الخبز الفرَّانُ

"خذ الحكمة ولو من فهم البهآئم"

How to Make Donut, Part 1 : Canadian Fried Dough


Doughnuts come in all shapes and sizes. They are the perfect way to treat yourself on a lazy weekend, or to indulge in a baking adventure. Store-bought doughnuts are great, but homemade ones are even better.

Here are three distinctive doughnut recipes to whet your appetite. Enjoy!
  • Prep time (Fried Glazed): 2 hours, 30 minutes
  • Cook time: 15 minutes
  • Total time: 2 hours, 45 minutes

Ingredients for Canadian Fried Dough
  • ½ cup warm water (110° F or 45° C)
  • 5 teaspoons active dry yeast
  • 1 pinch white sugar
  • 1 cup warm milk (110° F or 45° C)
  • ⅓ cup white sugar
  • 1½ teaspoons salt
  • 1 teaspoon vanilla extract
  • 3 beaten eggs
  • ⅓ cup vegetable oil
  • 5 cups whole-wheat flour, divided
  • 1 quart vegetable oil for frying

For dusting:
  • 2 cups white sugar
  • ½ teaspoon ground cinnamon, or to taste
1 - In a large bowl, mix yeast, warm water, and pinch of sugar until foam begins to show (about 5 minutes).

2 - Into the yeast mixture, stir in milk, ⅓ cup sugar, salt, vanilla extract, eggs, and ⅓ cup vegetable oil. Stir until the sugar has dissolved.

3 - Mix in about 2½ cups of the whole-wheat flour. Stir until the dough is too stiff to add more flour. Turn the dough out onto a floured surface, and begin to knead in more flour until the dough is no longer sticky. Continue kneading until dough is smooth and elastic (about 10 minutes).

4 - Form the dough into one big ball, place into a greased bowl, and cover. Let rest until the dough has doubled in size, about 1 hour.

5 - Place the dough back on a well-floured surface and knead again to reshape it. Break off a piece of dough roughly the size of a heaping tablespoon.

6 - Shape the heaping tablespoon of dough into a thin strip or an oval shape. You can use a rolling pin or your hands. The dough should be 0.25 inch (0.6 cm) thick. In Canada, fried dough is often called "Beaver Trails," so let your imagination run wild!

7 - Place rolled bits of dough under a cloth to rise while you shape the remainder of the dough.

8 - Heat oil in a deep fryer or large skillet to 375℉ (190℃). Oil should be at least 4–5 inches (10.2–12.7 cm) deep in your fryer or skillet.

9 - While oil is heating, combine 2 cups of sugar with cinnamon and set aside for dusting.

10 - Gently introduce pastries into the frying oil, one at a time, cooking for 1-2 minutes per side, until golden brown. Remove onto a wire rack.

11 - Remove excess oil from fried pastries with paper towels. Dip each pastry into the cinnamon sugar mixture while still warm.

12 - Enjoy.
التاجر الخبز الفرَّانُ

"خذ الحكمة ولو من فهم البهآئم"

Making Basic Sandwich Bread


1 - Assemble your ingredients. Sandwich bread works in basically the same prep process as the French bread, but with a few more ingredients to give it a sweet, soft, texture. Additions or alternative ingredients will be suggested throughout, but for the basic starter sandwich bread, you'll need:

  • 6 cups all-purpose flour (white or whole wheat)
  • 1 cup water
  • 1 cup milk
  • 2 tablespoons of unsalted butter
  • 2 tablespoons of sugar or honey
  • 1 tablespoon of salt
  • oil (optional)
  • 1 egg, beaten (optional)


2 - Activate the yeast. Using 1 cup of warm water (100-110 deg. F), sprinkle the yeast into the bowl of a standing mixer or a large mixing bowl and cover it with water to let it activate.

3 - Scorch the milk in a saucepan. Heat the milk quickly on the stove over high heat, until just before it boils, then take it off the heat and add in the butter and the sugar, mixing it thoroughly. You don't want to actually burn the milk, and be careful that it doesn't boil over, since milk tends to start frothing very quickly. Keep an eye on it and take it off the heat as soon as it starts to steam. Let it cool down slightly before you add it to the yeast.

  • Alternatively, it's perfectly fine to heat the milk in the microwave and add the butter and sugar when it's hot.


4 - Add the wet mix and 1 cup of the flour to the mixer. Stir the mixer for about 2 minutes at medium speed. As the dough starts to form, gradually continue adding in the rest of the flour, one cup at a time. When all the flour has been added, beat on a higher setting for 2 more minutes.

  • How much flour you use will depend on how humid it is, so keep an eye on the dough and use your judgment. Wheat flour is likewise very different to work with--you'll likely need to use less of it to form the dough. When you're first starting out, it might be a good idea to use half wheat and half white flour to get used to the difference.


5 - Turn out the dough and start kneading. Press all the leftover crumbs of flour into the dough ball, then turn the lump out onto your floury kneading surface. Keep kneading until the dough has a soft, smooth surface texture that springs back when you push into it.

  • Alternatively, it's perfectly fine to knead in your electric mixer, provided you've got a bread hook. It can be much easier on the hands. Knead the dough in the mixer for about 10 minutes to form the gluten strands that'll give the bread a wonderfully chewy texture.


6 - Cover the ball of dough with oil, and put it in an oily bowl. This stops the surface from drying out and cracking while it rises--the dried dough will become nasty lumps in your finished bread. Cover the bowl with a clean dish towel or plastic wrap and put the bowl in a warm (but not hot) location.

  • Leave the dough alone for about 90 minutes while it rises. It should about double in size, or at least plump up significantly if you're using a lot of wheat flour.


7 - Punch it down. Put your fists on the ball of dough and squish it until it's about the size you started with. You don't need to knead it again, as the dough should be soft and springy. Divide the dough into two equal portions with a chef's knife or a pastry knife to form your loaves.

8 - Roll two loaves and to greased loaf pans. On your kneading surface, roll out the dough with your hands by flattening it first into a kind of tall rectangle, then folding the bottom and top in toward the middle and pinching the seam closed. This will make the bottom of the loaf.

  • Add the loaves into the greased pans and cover the pans again with the towel to let the dough rise again for 30-45 minutes while you clean up the kneading surface and preheat the oven.


9 - Bake the bread at 400 °F (200 °C) for 35 minutes or until golden brown. Before adding the bread into the oven, slit the dough 3 or 4 times about a half inch deep to score the surface, then top with beaten egg or oil if you want to create a shiny crisp top crust.

  • The bread is finished when the bottom of the loaf is firm, and you're able to make a hollow tapping with your finger. If you're not sure, turn it out of the pan and check by tapping on it with your finger a few times. It'll be hot, so be careful.
التاجر الخبز الفرَّانُ

"خذ الحكمة ولو من فهم البهآئم"

How to Bake, Part 3 : Using Your Baking Skills


1 - Make Snickerdoodles. Snickerdoodles are a simple (yet elegant) sugar cookie that are mouthwatering paired with milk or ice cream or eaten on their own. Great for beginners, they're easy to bake and even easier to eat!

2 - Bake delectable sweet potatoes. Sweet potatoes are delicious, nutritious starches. They're rich in fiber, naturally great-tasting, and surprisingly versatile - sweet potatoes can be dressed with butter and some simple spices for a wholesome staple or loaded with beans, cheese, bacon, and other toppings for a decadent feast.

3 - Make crispy chicken thighs. Chicken thighs are an underrated cut of poultry - they're cheap, delicious, and lend themselves to finger-licking baked dishes. Marinate before baking for a rich flavor or rub the thighs with a dry rub or a glaze to give them a crispy, blackened texture.

4 - Bake a glazed ham. Whether it's for a family Easter dinner or just for own enjoyment, a baked ham with a sweet glaze makes for a great main course. Even better, you'll have leftovers to make delicious thick-sliced ham sandwiches for weeks.

5 - Bake a birthday cake. Cake recipes can be a little tricky, but if you pull one off, you'll instantly be a celebrity at the party. Birthday cakes have endless potential for decoration - with practice, you'll eventually be making masterpieces with fondant and frosting!
التاجر الخبز الفرَّانُ

"خذ الحكمة ولو من فهم البهآئم"

Homemade White Bread


Do you know how to knead? Do you know when to stop kneading? Thomas Joseph will answer all these questions and much more as he takes you step-by-step through the process for making a delicious homemade white bread.


Ingredients
  • 1 1/2 tsp 7 grams active dry yeast
  • 1/4 Cup warm water
  • 1 1/2 tsp sugar
  • 1 3/4 cup bread flour
  • 1 1/2 tsp salt
  • 1 cup warm water
  • 1 3/4 cup bread flour
  • 2 tbsp unsalted butter
التاجر الخبز الفرَّانُ

"خذ الحكمة ولو من فهم البهآئم"

How to Bake, Part 2 : Baking by Food Groups


1 - Bake breads, pastries, and desserts. When most people think of "baked goods," they think of breads and pastries - the kinds of foods you can commonly buy at a bakery. These types of foods usually use common ingredients like flour, butter, eggs, sugar, baking soda, salt, oil, milk, starch, cheese, and/or yeast to form a dough or batter which is then baked in sections or as a whole. Breads and pastries are often flavored with spices, syrups, and other additives to give them unique savory flavors. Here are a few basic points to remember when baking breads and pastries:
  • Your dish's final shape is usually dictated by the vessel it is baked in. A loaf of bread baked in a bread pan, for instance, will have a different shape than a ball of dough cooked on a flat pan.
  • Baked goods usually require special care to ensure they don't stick to their pan. Butter, shortening, oil, or aerosol sprays are commonly used to keep cooking pans slick.
  • Some baked goods which use yeast (especially breads) require extra time for the yeast to "rise." Yeast is a live, microscopic fungus which eats sugar in the dough, releasing carbon dioxide gas (which causes dough to "rise") and other compounds which affect the flavor of baked goods.
  • Generally, the higher the proportion of dry ingredients (flour, etc.) to wet ingredients (eggs, oil, milk, etc.) in a recipe, the crumblier the dough will be. One common trick for working with especially crumbly dough is to cool it in the freezer or refrigerator - it will thicken, becoming easier to handle and shape without crumbling.

2 - Bake meat and poultry. Along with frying, roasting, and grilling, baking is a great cooking method for meat and poultry. The hot, dry air used in baking can give a cuts of poultry a crispy, browned exterior while keeping the interior of the meat moist and juicy. Roasting a large cut of beef or lamb at a low temperature for hours is a great way to ensure you get a moist, flavorful final product that's cooked all the way through Here are some things to remember when baking meat and poultry:
  • When roasting large cuts of meat, have a meat thermometer handy, along with a list of the desired internal temperatures for different kinds of meat. It's much easier to use the thermometer to judge whether the meat's done than painstakingly removing it from the oven, cutting it all the way through, and placing it back in the oven.
  • Some people prefer removing the skin from pieces of poultry, while others prefer leaving it on. When seasoned and cooked, the skin can have a delicious crispy texture, but can slightly increase the fat and caloric content of the dish.
  • There are pros and cons for leaving the bone in cuts of meat (as opposed to removing the bone.) Cuts of meat with the bone in are generally cheaper and, according to some sources, more flavorful (though this is not backed up by hard evidence.) They also sometimes offer additional options for cooking (try stuffing garlic or other herbs into the section of ribcage attached to a bone-in chicken breast). On the other hand, eating around bones can be annoying.
  • Always cook meat and poultry thoroughly. A 2011 study found dangerous Staph bacteria in about half of the meat and poultry samples tested. Don't take any chances - make sure the center of the meat is cooked with no pink spots and that the meat's juices run clear. For bone-in meat, insert a fork to the bone, feeling for any resistance - a fork will smoothly and easily pierce a done piece of meat.

3 - Bake vegetables. Baked or roasted vegetable dishes are a nutritious addition to any meal. Some, like baked potatoes, stand up as delicious main courses. Compared to frying, baking is almost always a lower-calorie, higher-nutrition cooking option for vegetables. Brushed with a little oil and sprinkled with salt and pepper, vegetables can even be baked to give a crispy, satisfying crust. Here are just a few tips for baking vegetables:
  • Generally, vegetables are "done" when they're tender. However, different vegetables tenderize at different speeds - whole squashes, for instance, can take over an hour to soften, while carrots can take half as long. Look up cooking times for your vegetables before attempting to bake.
  • Some vegetable dishes (notably baked potatoes) require you to puncture the vegetable with a fork or knife before cooking. As the vegetable cooks, water trapped inside will heat and turn to steam. If it can't escape through pre-made holes, the pressure buildup may cause your vegetable to explode!

4 - Bake casserole dishes. Some baking recipes incorporate multiple types of food (some even cooked separately from the other ingredients) into a casserole-style dish. Often, these dishes use a carbohydrate, like rice, pasta, or a starch, as the central ingredient.The ingredients in these dishes are either layered or combined freely. Usually, the casserole is served directly from the deep-sided plate it was cooked in. Casserole dishes are filling, easy to serve, and often quite rich. Here are just a few examples of baked casserole-style dishes:
  • Lasagna
  • Ziti
  • Potatoes au gratin
  • Macaroni casserole
  • Moussaka
التاجر الخبز الفرَّانُ

"خذ الحكمة ولو من فهم البهآئم"

How to Bake, Part 1 : Baking Basics


Baking - it's a process so fundamentally simple that the earliest bakers managed to bake with only hot rocks over 4,000 years ago. Yet, because it allows for truly vast culinary complexity, baking is still an area of experimentation for curious chefs today. If you've never baked before, this guide will explain the basic foundations of baking, offer tips for baking specific food groups, and suggest a few recipes to get you started baking. Don't worry - if the ancient Egyptians could do it, so can you!


Part 1 : Baking Basics

1 - Find a heat source. When a food is baked, it is heated from its outside to its center, resulting in a toasted, crusty exterior,or soft interior. To bake, you need a heat source that can heat your food sufficiently for it to cook all the way through (for meat dishes, this is especially important, as undercooked meat can contain disease-containing pathogens.) By far the most common appliance used in baking is the oven. Modern ovens allow you to set precise, controlled temperatures for cooking and offer easy access to your food without leaking heat into the surrounding environment. Though less common, it's possible to bake with a variety of alternative methods, including:
  • Traditional outdoor ovens such as the Tandoor
  • Dutch ovens
  • Microwave ovens (technically, this is not baking - microwave radiation is used to warm the food. Still, "microwave baking" recipes exist for replicating traditional baked goods like brownies in the microwave.)

2 - Choose a sensible recipe. Baking projects can range from the simple (staple dishes like bread or chicken breasts) to massive undertakings (like the intricately-decorated desserts you might see on specialty cooking shows like Cake Boss. If you're a beginner baker, it's best to stick to something simple - a simple cookie recipe or some easy chicken thighs. Make sure you have all the ingredients in the recipe before beginning - rushing to the store while you're cooking is aggravating and can even tank certain time-sensitive recipes.
  • If you can, measure your ingredients out before beginning. It's not essential, but it makes the baking process much quicker.
  • Practice good food safety. Wash your hands before beginning any cooking project and after touching any uncooked ingredients which can harbor disease-causing bacteria (especially meat, poultry, and eggs.)
  • Wear clothes you don't mind getting dirty or try wearing an apron.
  • Helpful?

3 - Preheat your oven. By their nature, all baking recipes require high heats. Set your oven to the temperature called for in your recipe. Then, proceed to the next step! Leave your oven alone while it heats - ovens take time to reach the temperatures required for baking. In the time your oven takes to heat up, you can complete the other steps in your recipe. By the time your recipe calls for you to put your food in the oven, it should be at the correct heat. The oven will mostly make a noise once the oven has preheated.
  • It's tempting, but don't open the oven's door before you're ready to put your food in. Doing so will release heat trapped in the oven, lowering the temperature and increasing the time it will take to reach baking temperature.

4 - Follow your recipe. Every recipe is different - there's no set of rules that will guide you through every baking process perfectly. Most baking recipes, however, contain some or all of the following general steps:
  • Preparing your food (for meat, poultry, and vegetables.) Food placed directly in the oven without any preparation will taste dry and bland at best and will cook improperly at worst. Meats like chicken breasts often need to be marinated, stuffed, and/or browned in a frying pan before baking. Vegetables like potatoes need to be pricked with a fork before baking to allow moisture to escape. Almost every recipe contains some sort of preparatory process for the food.
  • Mixing your ingredients (for pastries, desserts, etc.) Often, the wet and dry ingredients are combined in separate bowls, then mixed together to form a dough or batter.
  • Preparing baking utensils. Pots and pans aren't always immediately suitable for baking. Sometimes, they need special preparation before baking - many baking recipes, for instance, require you to grease your pan.
  • Placing the food in or on a baking vessel. Your batter or prepared meat or vegetable won't cook properly if you set it at the bottom of the oven. Usually, your uncooked food is poured or placed into a heat-resistant metal, glass, or ceramic vessel which can easily be removed from the oven (with oven mitts.)
  • Cooking in the oven at a high heat. This is what defines baking. All baking recipes need to be baked in an oven (or suitable alternative.) Pay attention to instructions about how far the food should be from the heat source.

5 - Place your food in the oven. Once you have prepared your food using the recipe's instructions and made sure the oven is preheated, add the food (in its baking vessel) to the oven. Close the oven's door and set a timer for the amount of time your recipe specifies for baking. Now, wait for your food to cook and enjoy the delicious aromas that (hopefully) fill your kitchen.
  • Take this opportunity to clean the utensils you used to prepare your food.
  • It's OK to check on your food while it cooks by using an oven light or by opening the oven's door briefly. If you open the door, close it as quickly as possible so that the oven doesn't lose its heat. If you're worried that your dish may burn, check on it halfway through the baking process, then after the halfway point as needed.

6 - Remove your food from the oven. When your food's time is up and you've checked it to make sure it looks done, remove it from the oven. Make sure to use some form of hand protection - oven mitts are handy because they allow you to retain some of your hand's dexterity when holding your food, but bunched-up towels held carefully between your hands and the cooking vessel work in a pinch.
  • Be careful! Pay attention to your food as you remove it from the oven, taking special care not to spill any hot liquids. Baking can be a fun, relaxing process, but if care isn't taken during this step, it can result in painful injury.
  • Set your creation somewhere where it won't burn the surface it's sitting on or any nearby objects. Use a sturdy rag, an oven mitt, or a cooling rack to protect your counter tops.

7 - Let your food cool. Food is usually far too hot to eat when it comes out of the oven. It also may not have its "final" texture - cookies are almost too soft to hold when they come out of the oven. Finally, some recipes use the heat of the pan to continue to cook the food after it is taken out of the oven. Allow your food to cool before eating it - if your recipe calls for it, carefully transfer your food to a cooling rack, which allows the cool air to reach every surface of your food.

8 - Garnish or decorate your food. For some foods, external decorations can be primarily used to improve the food's visual presentation, for others, decorations are a vital part of the food's flavor. For instance, a parsley garnish is hardly essential for a baked pasta dish, but a plain, dry cake without frosting is incredibly bland. Your recipe may have specific instructions for decoration or even contain a separate list of ingredients for the decorative elements of your recipe (as is often the case with frostings and sauces.) Give your dish some finishing touches, serve, and enjoy!
التاجر الخبز الفرَّانُ

"خذ الحكمة ولو من فهم البهآئم"

Wot!!.. No Egg??!


By Andrea Wren
One of the first things that anyone who is curious about vegan baking wonders, is what do you use instead of eggs?

It certainly seems to be the thing that baffles most people when it comes down to experimenting with vegan baking.

Of course, vegan baking is more than being just egg-free, it's also dairy-free (no butter or milk) and otherwise animal-derivative free (no gelatine or honey, for example).

And because I'm keen to show that vegan baking is as easy as making warm, home-baked apple pie, I've put together 'Wot, No Eggs?! The Beginner's Guide To Becoming An Expert Vegan Baker' especially for you!

This is a FREE 16 PAGE ebook which sets out to de-mystify vegan baking, and provide you with valuable insider tips, information on how to repace eggs and dairy, as well as recipes and resources.

All you have to do to claim my book is sign up with your email below, hit the GO button, and after activating your subscription, the download of my ebook will be sent to your inbox!

Download : The Beginner's Guide To Becoming An Expert Vegan Baker
التاجر الخبز الفرَّانُ

"خذ الحكمة ولو من فهم البهآئم"

How to Make Flour Tortillas


Have you ever had a craving for those delicious tortillas made fresh in restaurants? Below is an easy and quick way to make flour tortillas from scratch! You'll need to mix the dough, flatten it into rounds and cook each one on the stove to create delicious tortillas perfect for filling with taco meat or veggies.


Ingredients
  • 4 cups or 512 grams  all purpose flour
  • 1/2 tsp or 2 - 3 grams baking powder
  • 1/2 cup or 113 grams lard or butter or vegetable shortening
  • 1 1/2 tsp or 7 grams salt
  • 1 cup or 250 ml warm water
  • 4 tbsp or 20 ml olive oil or cooking oil

Steps
  1. Mix the flour and baking powder in a bowl.
  2. Add the shortening and mix it in with your hands until you get a coarse meal consistency.
  3. Dissolve the sea salt into the water.
  4. Drizzle the salt water mixture into the flour and mix with your hands into a soft dough. Add more warm water if it's not coming together, add oil and mix it again. 
  5. Form the dough into a ball. Put it in a bowl and cover for 20 minutes. Resting the dough before rolling it out is the secret to making them easier to roll.
  6. Break the dough ball into twelve smaller balls. Put a little bit of shortening on your hands and roll them into balls.
  7. Flatten each ball out into a tortilla. Put flour on the surface before rolling them out. Get them as thin as possible.
  8. Preheat a pan on medium heat. Cast iron works well for tortillas.
  9. Lay the tortilla on the pan and flip after 15-20 seconds. Bubbling is normal.
  10. Then you got your tortillas.
التاجر الخبز الفرَّانُ

"خذ الحكمة ولو من فهم البهآئم"

How to Make Self Rising Flour


If your recipe calls for self-rising flour, and you only have all-purpose at home, there is no need to panic. It is quite simple to make your own self-rising flour using ingredients you likely have at home. This article will show you how to do that. It will also show you how to make a gluten-free variation for those who have allergies.


Ingredients

Self Rising Flour
  • 1 cup (150 grams) all-purpose flour
  • 1 ½ teaspoons baking powder
  • ¼ - ½ teaspoon salt
  • ¼ teaspoon baking soda.
Gluten-Free Self Rising Flour
  • 1 ¼ cup (170 g) brown rice flour
  • 1 ¼ cup (205 g) white rice flour
  • 1 cup (120 g) tapioca flour
  • 1 cup (165 g) sweet/glutinous rice flour
  • 2 scant teaspoons xanthan gum
  • 6 ¾ teaspoons baking powder
  • 1 1/8 teaspoon salt

Making Self Rising Flour
  1. Start with 1 cup (150 grams) of all-purpose flour. Sift the flour into a large mixing bowl. If your recipe calls for more flour, simply increase the proportions.
  2. Add 1½ teaspoons of fresh baking powder. Make sure that the baking powder is fresh. If the baking powder is not fresh, your self-rising flour will not work as well.
  3. Consider adding ¼ teaspoon of baking soda if your recipe calls for buttermilk, cocoa, or yogurt. These ingredients require a little extra raising power. The baking soda (in addition to the baking powder) will give them just that.
  4. Add ¼ to ½ teaspoon of salt. Take a look at your recipe. If your recipe already contains salt, about ¼ teaspoon of salt added to your all-purpose flour will do. If your recipe does not contain salt, bump it up to ½ teaspoon of salt.
  5. Sift the ingredients together to make sure they are evenly combined. Use a whisk or fork to mix them together.
  6. Use the flour in your recipe. Keep in mind, however, that store-bought self-rising flour is made from a slightly different wheat. Whatever you are baking will not be quite as tender.
  7. Store any left over flour in an air tight container, and write the expiration date.Note the expiration date on your baking powder. This is when your self-rising flour will expire too. Copy the expiration date from your baking soda into your self-rising flour container.

Making Gluten Free Self Rising Flour
  1. Combine the flours in a large mixing bowl. Mix them together using a whisk or fork until they are evenly combined.
  2. Add the xanthan gum. You will need just a little less than 2 teaspoons. Again, make sure that you mix it in well.
  3. Prepare the rising agent. In a separate bowl, combine the baking powder and the salt. You will need about 6 ¾ teaspoons of baking powder and 1 1/8 teaspoon of salt. If you won't be using all of your gluten-free flour mix, use 1½ teaspoon of baking powder and ¼ teaspoon of salt for each cup of flour.
  4. Sift the rising agent into the flour. Mix the two together using a whisk or fork until everything is evenly combined.
  5. Use the flour in your recipe, and store any left over flour in an air-tight container. Take note of the expiration date on your box of baking powder. This is when your self-rising flour will expire. You might want to copy this date down onto the container you will be keeping your flour in. When you are done, put the container in a cool, dark place.

Tips
  • Self-rising flour is the same thing as self-raising flour.
  • If you have self-raising flour, and need all-purpose flour for a recipe, simply use less baking soda and salt in your recipe.
  • When making larger batches, measure your flour by weight (grams) instead of by volume (cups). This will help keep things more consistent.
  • Try it with whole-wheat flour. Remember to keep the proportions the same.

Warning
  • Your homemade self-rising flour will not last forever. It contains baking soda, which loses some of its raising abilities over time. The longer your flour sits, the less your cakes will rise.
  • Store-bought self-rising flour is made from a softer wheat than all-purpose flour. This helps make baked goods more tender. Adding baking powder to all-purpose flour will give you similar results, but the final baked good will not be as tender.
التاجر الخبز الفرَّانُ

"خذ الحكمة ولو من فهم البهآئم"

Friday, March 18, 2016

The Homemade Bread Cookbook


Book Description
Bread is a basic food prepared by cooking water and dough of flour and potentially other ingredients. Doughs are generally baked in the Western world and several other countries. In other cuisines, bread is fried, steamed or baked on a hot skillet. It can be unleavened or leavened too. Salt, leavening agents and fat like baking soda and yeast are basic ingredients. Bread may also have other ingredients like egg, sugar, milk, spice, fruit like raisins, nuts like walnuts, vegetables like onion and seeds like poppy seeds. Bread is among the oldest prepared foods in the world, dating back hundreds of years. Leavened bread can also be traced back to prehistoric periods. Download this ebook full of bread history, tips, facts and recipes today!
Download Free Ebook : The Homemade Bread Cookbook
التاجر الخبز الفرَّانُ

"خذ الحكمة ولو من فهم البهآئم"

How to Open a Bakery


If you've ever dreamed of opening a bakery, your chances of success may be high: baked goods and bakeries are among the fastest-growing industries for small businesses. In 2010, bakeries accounted for 2.1% of the US GDP. You'll need some planning and entrepreneurial savvy, but if you're willing to work hard, you can make a name for yourself – or at least for your cupcakes and baguettes.


Read the rest hereHow to Open a Bakery


التاجر الخبز الفرَّانُ

"خذ الحكمة ولو من فهم البهآئم"

The Baker’s Guide to Opening a Successful Bakery


Copy of How to Start a Bakery
Are you the one that makes killer cakes for every birthday? Do you churn out to-die-for donuts? If you’re ready to turn your talents into a profitable bakery, you’ve come to the right place.
We’ve teamed up with two amazing bakers who were able to share their great business advice. This guide is meant to give you all of the ingredients you need to plan, start, and grow a successful bakery.
To get your piece of the pie, combine these tips with your impressive baking talents and you’ll be on your way to success.
التاجر الخبز الفرَّانُ

"خذ الحكمة ولو من فهم البهآئم"

Cup To Gram Conversions


Apabila kita membaca suatu buku resepi atau mana-mana resepi yang kita temui baik dalam bentuk hard copy atau di internet, kita sering berhadapan dengan bacaan sukatan bahan-bahan yang pelbagai, di bawah ini terdapat sedikit maklumat berkenaan penukaran cup kepada gram, harap ianya sedikit sebanyak dapat membantu anda.

Butter
Cups Grams
1/4 cup of Butter 57 grams
1/3 cup of Butter 76 grams
1/2 cup of Butter 113 grams
1 cup of Butter 227 grams

Dry Goods
All-Purpose Flour and Confectioners’ Sugar
Cups Grams Ounces
1/8 c (2 tbsp) 16 g .563 oz
1/4 cup 32 g 1.13 oz
1/3 cup 43 g 1.5 oz
1/2 cup 64 g 2.25 oz
2/3 cup 85 g 3 oz
3/4 cup 96 g 3.38 oz
1 cup 128 g 4.5 oz

Bread Flour
Cups  Grams Ounces
1/4 cup 34 g 1.2 oz
1/3 cup 45 g 1.6 oz
1/2 cup 68 g 2.4 oz
1 cup 136 g 4.8 oz

Rolled Oats
Cups Grams Ounces
1/4 cup 21 g .75 oz
1/3 cup 28 g 1 oz
1/2 cup 43 g 1.5 oz
1 cup 85 g 3 oz

White Sugar (Granulated)
Cups Grams Ounces
2 tbsp 25 g .89 oz
1/4 cup 50 g 1.78 oz
1/3 cup 67 g 2.37 oz
1/2 cup 100 g 3.55 oz
2/3 cup 134 g 4.73 oz
3/4 cup 150 g 5.3 oz
1 cup 201 g 7.1 oz

Packed Brown Sugar
Cups Grams Ounces
1/4 cup 55 g 1.9 oz
1/3 cup 73 g 2.58 oz
1/2 cup 110 g 3.88 oz
1 cup 220 g 7.75 oz

Honey, Molasses & Syrup
Cups Grams Ounces
2 tbsp 43 g 1.5 oz
1/4 cup 85 g 3 oz
1/3 cup 113 g 4 oz
1/2 cup 170 g 6 oz
2/3 cup 227 g 8 oz
3/4 cup 255 g 9 oz
1 cup 340 g 12 oz


التاجر الخبز الفرَّانُ

"خذ الحكمة ولو من فهم البهآئم"